
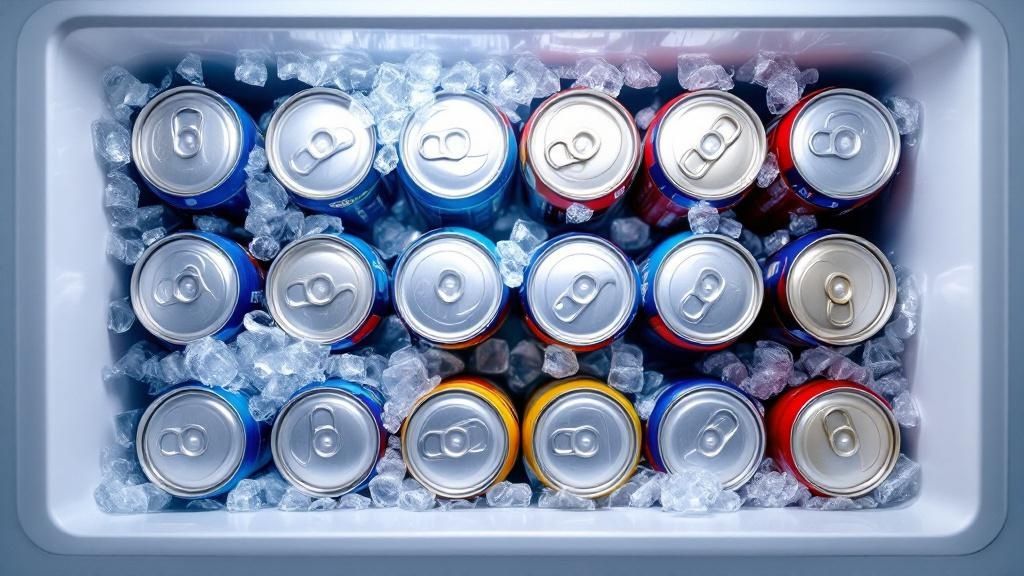
If you want your ice to last, the secret isn't some magical trick. It's about getting a few key things right: using the right type of ice, insulating it properly, and packing it strategically. But the biggest and most immediate upgrade you can make is a simple one—ditch the small, quick-melting cubes for large, dense blocks of ice. This one change alone can dramatically slow down the melt.
The Science of Keeping Your Ice Frozen Longer
To really master the art of long-lasting ice, you need to understand a bit of basic physics. It all comes down to the surface-area-to-volume ratio.
Think about it this way: a big handful of crushed ice has a ton of surface area exposed to the warmer air around it, which is why it turns into a puddle so fast. On the other hand, a single, solid block of ice of the same weight has way less surface area compared to its dense, frozen core.
This isn't a small difference, either. In real-world conditions, a large ice block can melt 25% to 40% slower than the same amount of smaller cubed or crushed ice. This principle is exactly why a big block of ice is the foundation of any multi-day camping trip, while smaller cubes are better suited for quickly chilling a single drink.
Ice Type and Its Impact on Melt Rate
Choosing the right ice really depends on what you're trying to do. This table breaks down how different ice shapes and sizes perform, helping you choose the most effective type for any situation.
| Ice Type | Relative Surface Area | Average Melt Rate | Best For |
|---|---|---|---|
| Block Ice | Lowest | Slowest | Long-term cooler chilling (camping, multi-day trips) |
| Large Cubes | Low | Slow | High-end cocktails, whiskey on the rocks (minimal dilution) |
| Standard Cubes | Medium | Moderate | Filling gaps in coolers, everyday drinks |
| Crushed Ice | Highest | Fastest | Flash-chilling drinks, making slushies, presenting seafood |
The best approach often involves a mix-and-match strategy. By using a combination of ice types, you get the best of both worlds: long-lasting cold from the block and quick, comprehensive chilling from the cubes.
Pro Tip: For maximum cooler efficiency, start with a solid base of block ice. Pack your food and drinks around it, then fill every last nook and cranny with smaller cubed ice. This creates a solid, cold mass with minimal air pockets, keeping everything frozen for days.
Mastering Your Cooler for Peak Performance
Even the fanciest cooler is only as good as the way you pack it. If you want your ice to last for days instead of turning into a soggy mess, you need to think like a seasoned camper. It all starts before a single cube of ice goes in.
The first, and frankly non-negotiable, step is to pre-chill your cooler. A warm cooler that’s been sitting in a hot garage or shed is an ice killer. It forces your fresh ice to waste all its precious cold energy just cooling the plastic walls instead of your food and drinks. The night before a trip, bring it inside and toss in some sacrificial ice packs or a few frozen water bottles. This "priming" process gets the internal temperature way down, creating a stable, cold environment ready for the main event.
The Art of Strategic Layering
Once your cooler is properly chilled, it's time to pack smart. The goal is to eliminate as much empty air space as possible—air is the enemy of cold. A thoughtful layering strategy is the secret to making your ice last.
This simple workflow shows you exactly how to get your cooler ready for maximum ice retention.
As you can see, adding your main ice should be the very last thing you do. This ensures it's working to maintain the cold, not create it from scratch. This approach is really just a modern take on basic insulation principles people have used for centuries. A high-end cooler is essentially applying today's technology to those same old methods, using advanced foams and reflective liners to slow down heat transfer.
It's why ice in a well-packed cooler can easily last up to 48 hours even in warm weather, while a pile of ice left out in the open melts in just a few hours.
A packed cooler is a happy cooler. Any empty space is just an invitation for warm air to sneak in and speed up the melting process. Fill every nook and cranny with smaller ice cubes, frozen water bottles, or even a few rolled-up towels to create one solid, cold mass.
For the ultimate setup, here’s the packing order I swear by:
- Bottom Layer: Start with a solid foundation of block ice. It melts much slower than cubes.
- Second Layer: Next, add your most frozen items, like meats and pre-made meals.
- Third Layer: On top of that, place your pre-chilled food and drinks.
- Top Layer: Finish by covering everything with a generous layer of cubed ice. These smaller cubes fill in the gaps and are also perfect for scooping into individual drinks. Speaking of which, you can learn more about the benefits of using slow-melting ice cubes in our dedicated guide.
Crafting Your Own Ice Blocks
You don't need to get fancy to create large, slow-melting blocks of ice. Honestly, some of the best tools are probably already in your kitchen.
- Loaf Pans: A standard metal or silicone bread loaf pan creates a perfectly sized block that slots neatly into most rectangular coolers.
- Food Storage Containers: Grab your plastic or glass containers to make custom-sized blocks. Just be sure to leave a little room at the top for the water to expand as it freezes.
- Muffin Tins: These are fantastic for making oversized cubes that work equally well in a cooler or a single drink.
Expert Tip: Temper Your Ice Ever pulled ice straight from the freezer, dropped it in a drink, and watched it immediately crack into a dozen tiny pieces? That’s thermal shock. To prevent this, just let your ice "temper" on the counter for a minute or two before you use it. This small step allows the surface temperature to rise just enough to make it far more durable.
By making denser ice at home, you’re building a solid foundation for success. This ice, combined with smart cooler packing, is the real secret to making it last for any occasion.
For those who want to take this skill to the next level, especially for cocktails, we’ve put together a full guide on how to make clear ice at home.
Enjoying Icy Drinks Without the Dilution
While keeping a cooler full of ice for a weekend trip is one challenge, the battle against melt gets a lot more personal when it's happening right in your glass. Here, the goal isn't just about bulk cooling—it's about protecting the integrity of your drink.
Nothing ruins a well-made cocktail or a fine spirit quite like a rush of meltwater from cheap, cloudy ice. It’s a common frustration. That's why knowing how to make your ice last longer in your drink is just as crucial as knowing how to pack a cooler for the long haul.
The single best move you can make is to rethink the shape of your ice. Bartenders and spirit aficionados figured this out long ago: one large ice sphere or a single big cube is king. Its low surface-area-to-volume ratio is the secret. It chills your drink slowly and consistently, which means dilution is kept to an absolute minimum. The result? Your drink tastes just as incredible on the last sip as it did on the first. You can learn more about how premium cocktail ice elevates your drinking experience right here on our blog.
Smart Alternatives for Zero Dilution
Sometimes, you want absolutely no dilution at all. For a neat pour of a special whiskey or another spirit where you want to savor it pure, even the best ice isn't the right tool for the job. Luckily, you’ve got some excellent options.
- Whiskey Stones: Usually made from soapstone, you just pop them in the freezer and add them to your glass. They won't make your drink ice-cold, but they'll give it a pleasant, mild chill without adding a drop of water.
- Stainless Steel Cubes: These are a step up in chilling power. They often contain a non-toxic gel that freezes solid, getting much colder than stones and providing a more noticeable chill, all with zero dilution.
- Frozen Grapes: This is a fantastic, natural trick for chilling white wine or certain cocktails. They add a perfect chill without messing with the flavor profile.
Key Takeaway: Always, always pre-chill your glassware. Just 15-30 minutes in the freezer before you pour makes a world of difference. A cold glass won't immediately shock your ice into melting, which gives it a fighting chance to last longer and keep your drink perfectly crisp.
The demand for a perfectly chilled drink is a global one. In hotter climates or places with a strong culture around frozen treats, finding ways to make ice last is a part of daily life. For instance, New Zealanders are some of the biggest consumers of ice cream in the world, which shows a deep appreciation for all things frozen. You can dig into more about global ice cream consumption data on uoguelph.ca. By borrowing a few of these simple ideas, you can make sure every drink you pour is perfectly chilled, every single time.
Common Mistakes That Destroy Your Ice
Sometimes, the reason your ice vanishes so quickly has less to do with a scorching sun and more to do with a few common, accidental habits. Learning how to make ice last longer often means unlearning these small but destructive mistakes. It’s surprisingly easy to sabotage your own efforts without even realizing it.
One of the biggest culprits is constantly opening the cooler. I see it all the time at barbecues and on camping trips. Every time you lift that lid, you're not just grabbing a drink; you're letting all that dense, cold air spill out and inviting a rush of warm air in. This forces your ice to work overtime to bring the temperature back down, accelerating the melt.
Draining the Meltwater Is a Major Mistake
It’s almost a universal instinct. You see that pool of chilly water at the bottom of your cooler, and your first thought is to pull the plug and drain it. This is probably the single most damaging thing you can do for ice retention.
That icy water is your absolute best friend in the fight against melting. It's hovering right around 32°F (0°C) and acts as an incredible insulator for the solid ice that's left. It fills all the tiny air gaps between your ice cubes and drinks, creating a stable thermal bath that keeps everything uniformly chilled.
By draining the meltwater, you replace that super-chilled liquid with warm, destructive air. This air immediately begins to attack the surface of your ice, causing it to melt at a much faster rate. Keeping the water is a core principle for making ice last longer.
Other Ice-Killing Habits to Avoid
Beyond those two big blunders, a few other common practices will turn your perfectly good ice into a puddle way too fast. Keep these simple but crucial details in mind before and during your next outing.
- Placing the Cooler on Hot Ground: Surfaces like sun-baked asphalt, sand, or dark concrete radiate a ton of heat. That heat transfers directly to the bottom of your cooler, attacking your ice from below. Always try to place it on a cooler surface like grass, or even better, elevate it on a block of wood or a dedicated cooler stand.
- Adding Warm Items: Never, ever put warm cans of soda or room-temperature food directly into an iced-up cooler. You’re forcing your ice to do all the heavy lifting of chilling those items from scratch, which wastes its precious cold energy. Pre-chill everything in a refrigerator before it even thinks about going into the cooler.
Answering Your Top Ice Longevity Questions
Even with the best game plan, there are always a few lingering questions when it comes to keeping ice from melting. I get asked these all the time. Let’s tackle some of the most common ones to clear things up and get you the best results from your cooler.
Should I Add Salt to My Cooler Ice?
Absolutely not. That is, unless you want to turn your ice into a puddle as fast as possible. Adding salt to ice dramatically lowers its freezing point, which is great if you're trying to make old-fashioned ice cream in a hand-crank machine, but it’s a disaster for keeping things cold long-term.
That salty slushy mixture is the enemy of ice longevity. For keeping food and drinks chilled for days on end, stick to pure, fresh water for your ice.
Is Dry Ice a Better Option Than Regular Ice?
Dry ice is a fantastic tool, but it's for a completely different job. Clocking in at a mind-numbing -109.3°F (-78.5°C), it’s the undisputed champion for keeping things frozen solid—think venison from a hunting trip or pre-made meals for a long expedition. The best part? It sublimates, turning directly from a solid into a gas, so there's no watery mess to clean up.
But it’s not something to be trifled with. You need to follow some serious safety rules:
- Handle with care: Never touch it with bare hands. Always use insulated gloves to prevent nasty burns.
- Ventilation is critical: Your cooler can't be airtight. The carbon dioxide gas needs a way to escape, or you risk a dangerous pressure buildup.
For just chilling beers and keeping your potato salad at a safe temperature, good old-fashioned water ice is a much safer and more practical choice.
Does Cooler Color Actually Make a Difference?
It sure does. The color of your cooler can have a bigger impact than you'd think, especially if it’s going to be sitting out in the sun.
A lighter-colored cooler, especially a white one, is your best friend on a sunny day. It reflects the sun’s rays, absorbing far less heat. A dark green or blue cooler left on a beach or a sun-drenched campsite will get noticeably hotter to the touch, forcing the ice inside to work overtime and melt much faster.
Should I Drain the Meltwater from My Cooler?
Whatever you do, resist the urge to pull that drain plug! I know it’s tempting, but that chilly pool of water at the bottom of your cooler is one of your most valuable assets.
That meltwater is hovering right around freezing temperature (32°F or 0°C) and acts as a brilliant thermal insulator for the solid ice you have left.
It fills in all the air gaps between your ice blocks and food, bathing everything in a uniformly cold environment. Draining it just lets warm air rush in, and warm air is the mortal enemy of ice. Keep the water in.