
If you've ever pulled a tray of ice from your freezer and wondered why it’s always got that cloudy, white center, you’re definitely not alone. It’s a common frustration for anyone trying to up their cocktail game at home.
The secret to crystal-clear ice isn't really about the type of water you start with. It’s all about how you freeze it. By controlling the direction of the freeze, you can quite literally push all those pesky air bubbles and impurities out, leaving you with a perfectly transparent cube.
Why Your Homemade Ice Is Always Cloudy
That familiar white, cloudy core in your ice cubes? It's the result of your standard ice tray doing its job a little too well. When you stick a tray in the freezer, the water is hit with cold air from every direction—top, bottom, and all sides.
This causes the water to freeze from the outside in. As the outer shell of ice forms, it starts trapping all the dissolved air and tiny mineral particles that are naturally in your water. With nowhere left to go, they get squeezed into the very last part of the cube to freeze: the center. That’s what creates that fuzzy, cloudy core. It's not bad water; it's just trapped stuff.
So, What About All Those Clear Ice “Hacks”?
You’ve probably heard a few tricks for making clear ice. Boil the water. Use distilled water. Boil it twice! While these ideas sound logical, they don't get to the heart of the problem, which is trapped air and impurities.
By the way, those little white flakes you sometimes see in your glass after an ice cube melts? They’re just the concentrated minerals from your tap water. It’s perfectly harmless, especially if you have hard water.
Let’s quickly look at why these popular methods fall short.
Common Ice Myths vs Directional Freezing Reality
So many home bar enthusiasts get stuck on these common myths, only to end up with the same cloudy cubes. Here’s a quick breakdown of why they don't work and what science says instead.
| Common Myth | Why It Fails on Its Own | The Scientific Solution |
|---|---|---|
| Boiling Water | The idea is to remove dissolved air. While it does work initially, the water re-absorbs air from the atmosphere as it cools down before freezing. | Directional Freezing. Freezing slowly from one direction pushes air and impurities out, purifying the ice as it forms. |
| Using Distilled/Filtered Water | This tackles minerals and impurities, but it does nothing to stop air bubbles from getting trapped. You might get cleaner cloudy ice, but it's still cloudy. | Insulation. Using an insulated cooler forces the water to freeze slowly from the top down, giving air and impurities an escape route. |
At the end of the day, these shortcuts just can't replicate the physics of directional freezing.
The real difference between cloudy and clear ice comes down to one thing: control. Instead of letting ice freeze chaotically from all sides, we need to guide the process. For a closer look at how this impacts your drinks, you can explore a comparison of clear versus cloudy ice and see why it matters for both flavor and looks.
The ultimate goal isn’t just to use pure water—it’s to create pure ice. And the only way to do that at home is with a technique called directional freezing.
The Cooler Method for Directional Freezing
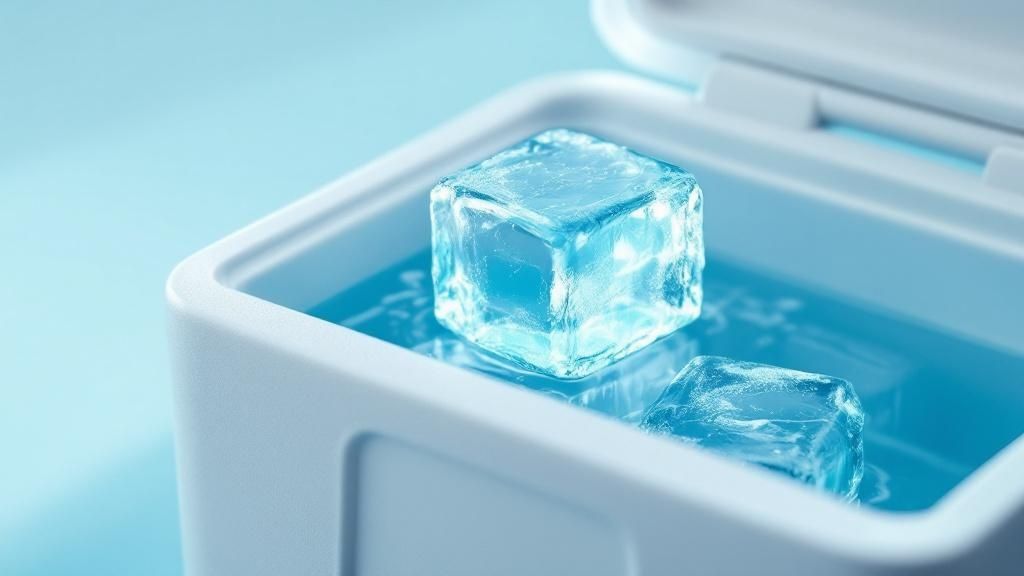
If you're ready for the simplest, most effective way to make clear ice at home, look no further than your trusty picnic cooler. This technique, affectionately known as the "cooler method," is the gold standard among home bar enthusiasts. Why? Because it perfectly replicates professional directional freezing using gear you probably already have. All you need is a small, hard-sided cooler that can squeeze into your freezer.
The magic here is all about insulation. A cooler is built to keep the cold out, but when you stick it inside a freezer, it does the opposite. It insulates the water on all sides except the top, which you leave open to the frigid air.
This setup forces the water to freeze slowly from the top down. As that first layer of ice forms, it systematically shoves all the dissolved air and mineral impurities downward, away from the freezing front. What you're left with is a big block of ice that’s stunningly clear on top, with a cloudy, sacrificial layer at the bottom where all the junk gets trapped.
Setting Up Your Cooler for Success
Getting this right is surprisingly straightforward. Grab a small, hard-sided cooler—a 5-to-9 quart "personal" size is perfect. The only real requirement is that it fits in your freezer with the lid off. Don't worry about special trays or molds for this part; just pour regular tap water directly into the cooler until it's about two-thirds full.
The big takeaway? Controlling the freezing environment with an insulated container is far more important than what kind of water you start with.
Perfecting the Freeze Time
Now comes the hard part: waiting. Place the lidless cooler in your freezer and just leave it be. The perfect freeze time really depends on your freezer’s temperature and how much water you’re using, but a great starting point is somewhere between 18 and 24 hours.
Your goal is a partial freeze. You want the block to be mostly solid, but with a small pocket of unfrozen water still sloshing around at the very bottom. This liquid reservoir is where all those cloudy impurities have been pushed. If you let it freeze completely solid, you’ll just trap those impurities right back in the ice, ruining the effect.
Pro Tip: Check on your ice block after about 18 hours. You should see a beautiful clear layer on top with a noticeably cloudy section forming below it. If you can still see or hear liquid water at the bottom when you gently tilt the cooler, you've nailed it.
Harvesting Your Clear Ice Block
Once the timer is up, it's time for the big reveal. Pull the cooler from the freezer and let it sit on your counter for about 10-15 minutes. This is called tempering, and it just lets the outside of the ice block melt enough to release its grip on the cooler's walls.
After a few minutes, flip the cooler upside down over a clean cutting board or a baking sheet. The block should slide right out with a satisfying thud. If it’s being stubborn, just give it a few more minutes to temper. Don't try to force it.
You'll be looking at a large block of ice with two very distinct sections:
- A perfectly clear top portion—this is your prize.
- A cloudy, brittle bottom layer that holds all the trapped air and minerals.
Separating the good from the bad is surprisingly easy. Grab a serrated knife (a bread knife works wonders) and gently score a line along the boundary where the clear ice meets the cloudy stuff. A few firm taps on the back of the knife with a mallet or even a wooden spoon is usually all it takes to split the block cleanly. You’re now left with a gorgeous slab of crystal-clear ice, ready to be cut into cubes for your next cocktail.
Choosing Your Clear Ice Making Gear
While the cooler method is a fantastic DIY hack, you might eventually want something a bit more… permanent. Let's be honest, it's effective, but it takes up a lot of freezer real estate. This is where dedicated clear ice gear comes in, offering convenience and consistency without turning your freezer into a science experiment.
The market for this stuff has absolutely exploded. What was once the exclusive domain of high-end cocktail bars is now accessible for home kitchens.
Directional Freezing Molds
The most logical step up from the cooler method is a dedicated directional freezing mold. Think of it as a miniaturized, purpose-built version of your cooler. These are compact, insulated boxes with silicone molds for cubes or spheres sitting inside. They work on the exact same top-down freezing principle, just on a much more manageable scale.
These systems are a game-changer for a few reasons:
- They’re consistent. You get perfectly shaped cubes or spheres every single time without the hassle of carving up a giant block.
- They save space. They are a fraction of the size of a picnic cooler and slide easily into a packed freezer.
- They’re incredibly easy to use. Just fill it up with water, pop it in the freezer, and wait.
The only real downside is the limited output. Most affordable molds will give you just two to six cubes at a time. This is perfect if you're making a couple of cocktails after work, but it won't cut it if you're hosting a party. For a full comparison of different methods, you might want to read our complete guide on how to make clear ice at home.
The magic of these molds is the reservoir of water sitting below the silicone shapes. As the ice freezes directionally from the top down, it pushes all the air and impurities into this lower section, leaving you with crystal-clear cubes or spheres.
Countertop Clear Ice Makers
Now, if you're serious about your ice game and want a high-volume, on-demand supply, a countertop clear ice maker is the ultimate upgrade. These machines are essentially miniature commercial units designed for your kitchen counter. They work by continuously flowing water over a freezing plate, building up pristine sheets of ice that are then automatically cut into cubes.
So, how do these two options stack up for the home enthusiast?
| Feature | Directional Freezing Molds | Countertop Clear Ice Makers |
|---|---|---|
| Cost | $30 - $80 | $200 - $600+ |
| Output | Low (2-6 cubes per 24 hrs) | High (20-40 lbs per 24 hrs) |
| Ease of Use | Super simple, just fill and freeze | Plug-and-play, requires filling a water reservoir |
| Ice Quality | Excellent, truly clear | Excellent, consistent clarity |
| Best For | The occasional cocktail enthusiast, small batches | Frequent entertainers, high-volume needs |
Ultimately, the right gear comes down to your lifestyle. If you just want to elevate your nightly Old Fashioned, a quality directional mold is an affordable and brilliant starting point. But if you host often or simply can't be bothered with the 24-hour freeze cycle, investing in a countertop machine will give you an endless supply of perfect ice whenever you want it.
How to Cut and Shape Your Clear Ice Block
So, you’ve pulled a beautiful, transparent block of ice from your cooler using directional freezing. Awesome. Now for the fun part: turning that big slab into perfect cubes or spears for your drinks.
This might seem a little intimidating, but I promise it's a simple—and seriously satisfying—process once you get the hang of it.
First, let's talk safety. You're dealing with a slippery block of ice and a sharp knife, so please, take your time. Be deliberate with every move. I always work on a sturdy wooden cutting board because it gives me a non-slip surface and helps absorb some of the impact.
The toolkit you need is surprisingly simple. No need for fancy chisels or ice saws.
- A Serrated Knife: A long bread knife works perfectly. The serrated edge gives you a good grip on the ice, making it much easier to score a straight, clean line.
- A Mallet or Hammer: I prefer a rubber mallet for its firm but gentle impact. In a pinch, a small hammer or even the back of a heavy spoon will do the trick.
- A Clean Towel: This is just to steady the ice block and keep your hands from freezing solid.
Temper Your Ice Before You Do Anything Else
This is the one step people always want to skip, and it's absolutely critical. If you pull your ice straight from the freezer and try to cut it, it will shatter into a million useless pieces. The extreme cold makes it incredibly brittle.
From my experience, tempering your ice is non-negotiable. Just let the block sit out at room temperature for about 5 to 10 minutes. You’ll know it’s ready when the surface starts to look wet and a little glossy. This quick thaw relaxes the internal stress in the ice, making it much easier to get those clean, satisfying splits.
The Score and Tap Method
Once your ice has tempered, you can start breaking it down. The whole technique boils down to scoring a deep, straight line and then giving it a sharp tap to split the ice cleanly along that line.
Start by placing your ice block on the cutting board. Figure out where you want your first cut and place the tip of your bread knife on that spot. Using firm, steady pressure, drag the knife across the ice to create a groove about 1/8 to 1/4 inch deep. I usually go over the line a few times to make sure it's well-defined.
Now, place the knife blade right inside the groove you just made. Hold it steady with one hand. With the other, give the spine of the knife a confident, sharp tap with your mallet—right above your hand. It's more of a precise pop than a brute-force chop. If you did it right, the block should split perfectly along your scored line.
From here, just repeat the process. Break the large block into smaller slabs, then break those slabs down into your final cubes or spears. Don't stress about getting it perfect on your first go. It takes a little practice to get a feel for how much force to use.
Once you have your finished pieces, toss them in a freezer-safe bag. Now you've got a stash of gorgeous, clear ice ready to elevate any drink, any time.
Troubleshooting Common Clear Ice Issues
So, you’ve followed the directional freezing method to the letter, but your ice still isn't perfect. Don't sweat it. That’s a completely normal part of the learning curve, and something every ice enthusiast runs into. A few small tweaks are usually all it takes to go from a frustrating attempt to consistent, bar-quality results.
The most common snag by far is pulling out a block that’s still cloudy right through the middle. If you’re seeing a large, milky section instead of a small, contained one at the very bottom, your freezer is probably working a little too well.
Key Takeaway: If your block freezes too fast, it doesn't give the impurities and trapped air enough time to get pushed downward. This is what creates that cloudy center, defeating the entire purpose of directional freezing.
The fix is surprisingly simple: try turning your freezer temperature up a bit. Moving from a frigid 0°F (-18°C) to a slightly warmer 10°F (-12°C) can make all the difference. This slows the whole process down, giving the magic of directional freezing the time it needs to work.
Fixing Ice That Shatters Or Cracks
There’s nothing more frustrating than crafting a beautiful, clear block only to have it shatter the second you try to cut it or pour a drink over it. This thermal shock happens when the ice is too cold and brittle. The solution? Just a little patience.
- The Problem: Your ice cracks the moment you try to cut it or add liquid.
- The Solution: You need to temper the ice. Let your block or cubes sit at room temperature for about 5-10 minutes before you use them. You'll know it's ready when the surface starts to look wet and glossy.
This tiny step makes a massive difference, allowing the ice to relax just enough to handle the temperature change without cracking.
Adjusting Your Water Volume And Cooler Size
Believe it or not, the size of your cooler has a direct impact on your final result. If your cooler is too big for the amount of water you're using, it can over-insulate, slowing the freezing process to a crawl. On the other hand, if it’s too small, the whole thing might freeze too quickly.
For most home freezers, a 5-to-9 quart cooler hits the sweet spot. A good rule of thumb is to fill it about two-thirds of the way. This gives you a substantial block of clear ice on top while leaving enough space for the cloudy, impure layer to form at the bottom.
Mastering these little adjustments will take your ice game to the next level. If you're looking for more tips on achieving flawless clarity, you might find our guide to making perfectly transparent ice cubes helpful.
Frequently Asked Questions About Clear Ice
Even after you think you've nailed the process, a few nagging questions always seem to pop up on the journey to perfect ice. Think of this as your quick guide for those "what if" moments. We'll tackle the most common queries I hear and give you some real-world answers to help you fine-tune your technique.
One of the first things people ask is, "Do I really need to buy special water?" The short answer is no. While starting with filtered or distilled water gives you a slight head start by reducing mineral content, directional freezing is the real hero here. The whole point of the method is to push whatever impurities are present—even those in regular tap water—down and away. It’s far more about the how than the what.
Another common sticking point is the freezer temperature. It sounds backward, but a slightly warmer freezer can actually give you better, clearer ice. If you can set your freezer to around 10°F (-12°C), you slow the whole process down. This gives the impurities and air bubbles more time to get pushed out, leaving you with a much larger portion of crystal-clear ice.
Can I Make Clear Ice Faster?
I get it, you're excited to use your new ice. But patience is truly a virtue here. Unfortunately, there are no real shortcuts to speed up directional freezing. The entire method hinges on a slow, controlled freeze.
If you crank down the freezer temperature to rush it, you'll almost always end up with cloudy ice. The water freezes too quickly, trapping air bubbles before they have a chance to escape. A good, solid freeze is going to take anywhere from 18 to 24 hours. Plan ahead!
Why Are My Clear Cubes Cracking?
This is a classic problem, and it all comes down to thermal shock. When you take a perfectly frozen cube from a 0°F freezer and immediately pour room-temperature liquid over it, the drastic temperature difference causes the ice to expand and crack right down the middle.
The fix is surprisingly simple: just temper your ice. Let your clear cubes sit out on the counter for about five minutes before you use them. This little bit of time allows the surface temperature to rise just enough, making the ice far more resilient when your drink is finally poured.
Ultimately, making consistently great clear ice boils down to controlling the freeze direction and managing the temperature—both in your freezer and right before you make your drink.
Elevate your home bar with the same pristine quality trusted by top mixologists. For handcrafted, slow-melting clear ice delivered right to your door in NJ, NY, and CT, explore the exceptional offerings from Wolfe and Kensington at https://www.wolfeandkensington.com.